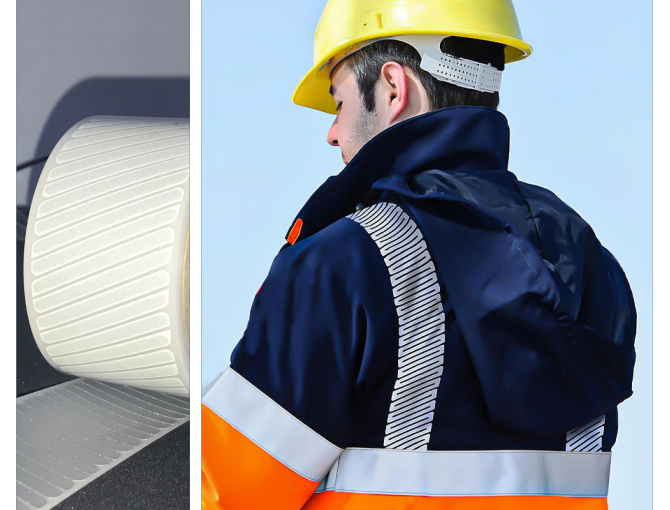
Segmented reflective heat transfer vinyl and perforated reflective tape are typically made by cutting or perforating a larger piece of reflective material into smaller segments or holes. The process generally involves the following steps:
1. Material selection: Choose a suitable reflective material, such as reflective fabric or vinyl, that meets the required specifications for visibility and durability.
2. Design and layout: Determine the desired pattern or layout for the segmented tape or perforated tape. This may involve designing a template or using computer-aided design (CAD) software to create the desired pattern.
3. Cutting or perforating: Use specialized equipment such as a laser cutter, die cutter, or perforation machine to cut the reflective material into the desired segments or create perforations. The equipment will follow the designed pattern to ensure precise and consistent results.
4. Quality control: Inspect the segmented or perforated tape to ensure that the cuts or perforations are clean and accurate. Remove any excess material or debris.
5. Packaging and distribution: Package the segmented or perforated tape according to the required specifications and distribute it to customers or retailers.
Laser Printing on Reflective Tape:
Laser printing on reflective tape involves using a laser printing process to create text, logos, or designs on the reflective surface. Here’s a general overview of the process:
1. Prepare the artwork: Design the desired text or artwork using graphic design software. Ensure that the design is compatible with laser printing and suitable for the reflective tape’s surface.
2. Set up the laser printer: Use a laser printing machine specifically designed for reflective materials. Adjust the printer settings, such as speed and resolution, based on the requirements of the artwork and the reflective tape.
3. Load the reflective tape: Place the reflective tape onto the printer, ensuring it is properly aligned and secured.
4. Printing process: Initiate the printing process, allowing the laser printer to transfer the ink onto the reflective tape. The laser technology will melt the ink onto the surface, creating a durable and visible print.
5. Quality control and finishing: Inspect the printed reflective tape to ensure the print quality meets the desired standards. Allow the ink to dry or cure according to the printer’s specifications.
Reflective Heat Transfer Logo:
Creating a reflective heat transfer logo involves transferring a reflective design onto fabric using heat and pressure. The process typically includes the following steps:
1. Design the logo: Create the desired logo or artwork using graphic design software. Ensure that the design is suitable for heat transfer and incorporates reflective elements.
2. Cut the reflective material: Use a cutting machine or plotter to cut the reflective material into the desired shape of the logo. Remove any excess material or unwanted sections.
3. Preheat the fabric: Place the fabric on a heat press or transfer machine and preheat it to the appropriate temperature. This step helps remove any moisture and ensures better adhesion.
4. Position the logo: Place the reflective logo onto the fabric in the desired location. Ensure it is properly aligned and secured using heat-resistant tape.
5. Heat transfer process: Close the heat press or transfer machine, applying heat and pressure according to the instructions provided by the reflective material manufacturer. This allows the adhesive on the reflective material to bond with the fabric.
6. Cooling and finishing: After the heat transfer process, allow the fabric and logo to cool down. Remove any protective film or liner from the reflective material. Inspect the logo for quality and durability.
It’s worth noting that the specific equipment and techniques used for these processes may vary depending on the manufacturer, supplier, or customization requirements.